Tempeh Forever
Posted on Sun 02 November 2025 in projects
Beans
I was told by my doctor recently to eat more beans. This is great advice, and beans have a special place in my heart. Because of their symbiotic relationship with nitrogen-fixing bacteria, no other plant family comes close to beans in terms of generating human bioavailable protein. Many enzymatic and microbial fermentation pathways have been invented by various cultures that improve the digestibility and flavor of beans. For example, tempeh is created when Rhizopus oligosporus is cultivated on soybeans (or another bean), and the result is beans with more flavor, more easily digestible protein, and fewer antinutrients. Tempeh can be used in place of meat in many recipes by just cutting it into the appropriate shape and frying it, and I have wanted to have a good source of tempeh in an effort to eat less meat.
Tempeh
I conceived of this project as a manic solution to multiple goals at once, and I imagined a system that would produce tempeh or other bean ferments in a relatively procedural and predictable way, and then give me a dataset that explained the progress. Here are the steps:
- A tempeh incubator with a temperature control device that would toggle a heating element to maintain the correct temperature. Data regarding the toggling of the element and also ongoing temperature/humidity information would flow to...
- An MQTT broker that accepts information from the control device and uploads it to...
- An online SQL server for storage, which can then be queried with...
- A Python visualization.
Controller
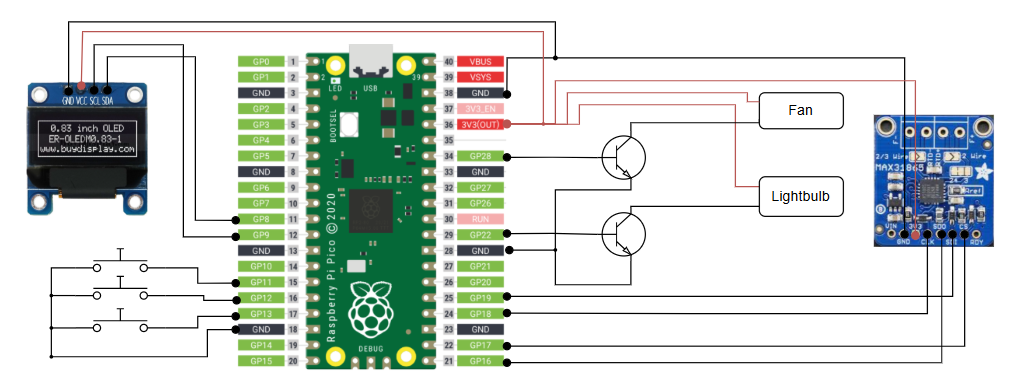
I used a pi pico 4W running a Micropython script as the incubator controller. It connects to a MAX31865 PT1000 temperature probe, which returns temperature over SPI. When the temperature is too low, a transistor drives a relay, which turns on the heating element, which is an old incandescent lightbulb. When the temperature hits the target, the heat relay turns off. When the temperature gets too high, a separate relay will turn on a fan that circulates air through incubator to cool it back down. A small OLED screen displays target temperature, actual temperature, and the status of wifi and MQTT. Two buttons next to the screen let me increase and decrease the target temperature. A third button lets me toggle MQTT transfer, in case I am debugging and don't want data uploaded.
Screen:
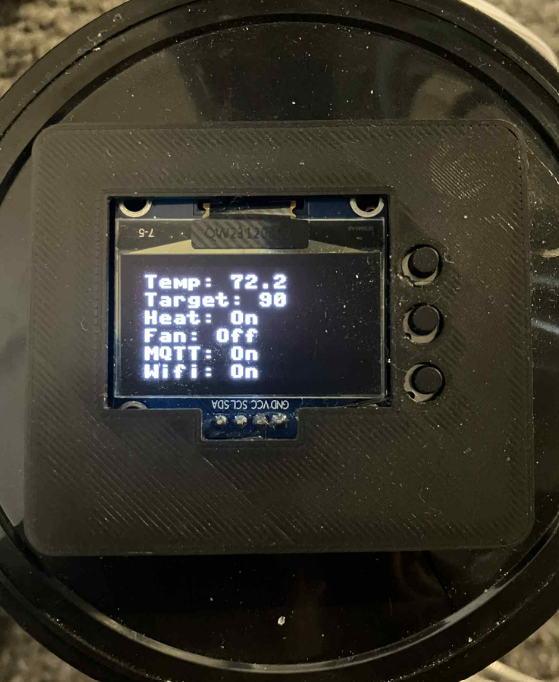
Diagram of the circuit:
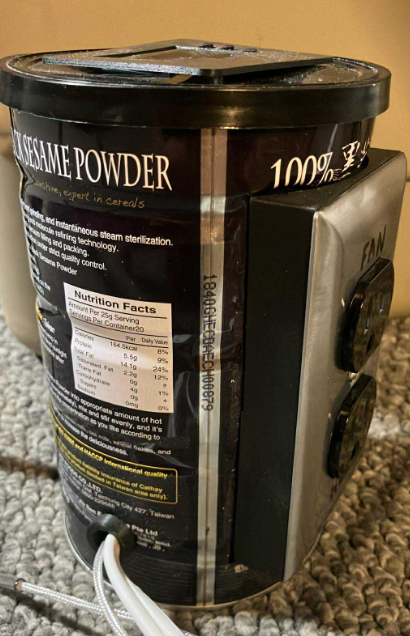
Circuit in real life:

Assembly
The incubator controller is housed in an old tin I had. I connected the relays to a standard power outlet so my heating and cooling devices could be switched out if needed, and the screen is built into the lid.
I 3D printed several parts, mostly for aesthetics, and these include:
- The plate for the OLED screen and buttons
- The bushing for the power cable and temperature probe to pass through
- The mount for the power outlets
- The cylinder that holds the cooling fan
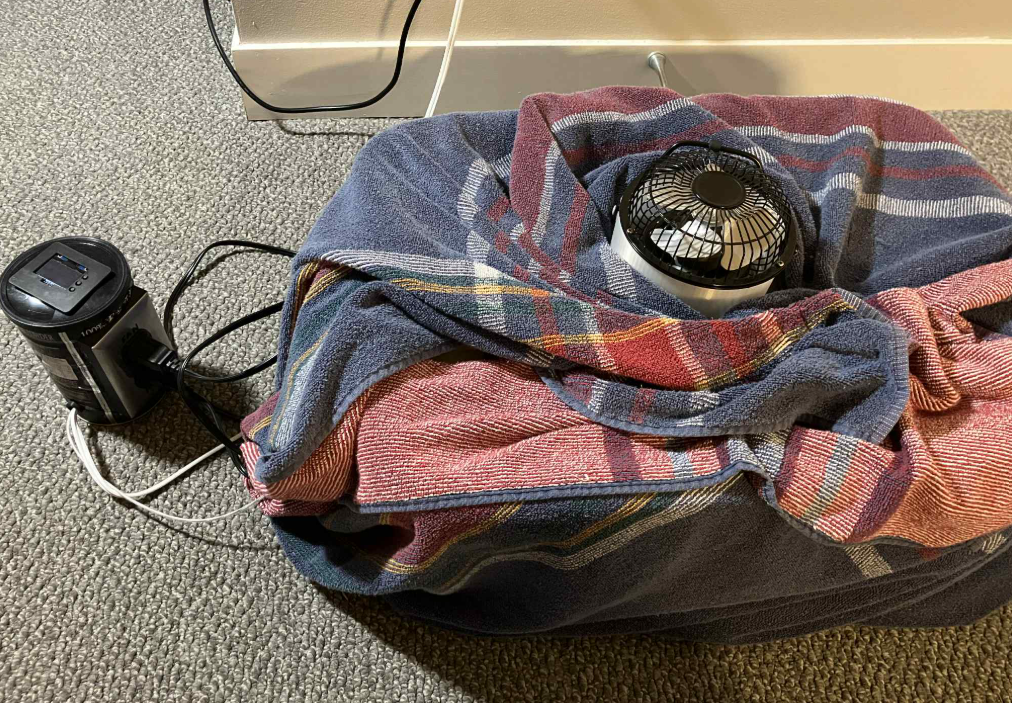
The box I am using for the incubator itself is an old Tupperware. The tray of beans rests on paracord I strung at mid-height. The tray is a stainless steel baking pan that I drilled a grid of holes into to improve airflow. I put the lightbulb at the bottom, then the tray, then I put the temperature probe on top of the tray, place the lid, place the fan column, and then wrap everything in towels and turn it on.
MQTT
MQTT is a lightweight messaging protocol often used in IoT devices that works via a system of topics and subscriptions. To send data, I am subscribing to three topics: tempeh/events/heat - Messaged when the heat is toggled tempeh/events/fan - Messaged when the fan is toggled tempeh/measurements - Messaged every minute with current incubator temperature
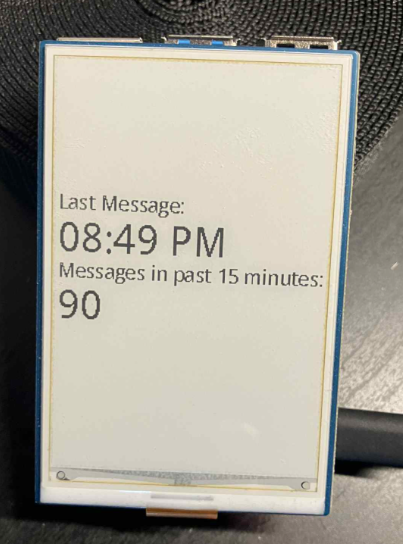
Data are sent from the pico to a separate raspberry pi that acts as an MQTT broker. The pi has an e-ink display that lets me know data is flowing.
The data is read from the MQTT message, converted into a SQL INSERT query, and then sent to a Neon server where I have created event and measurement tables. I had to use the MQTT broker because I couldn't find a reliable/compact SQL library for picos.
Everything At Once!!
Attempt 1: I soaked garbanzo beans for ~12 hours, and then tried to massage the hulls off because the tempeh mold can't penetrate hulls. I couldn't really get the hulls off and none of the methods mentioned online helped at all. So I made hummus!!
Attempt 2: This time I used 2 lb. of chana dal from an Indian market because it comes already hulled and split. I cooked them, without soaking, until they were slightly less than al dente, which was ~18 minutes. I let them cool and dry, then added 3 Tbsp. of tempeh starter. I put it in the tray, then sealed the tray with foil and poked holes in the foil for airflow. I put it in the incubator at 90 F. About 9 hours later, I notice the lightbulb has been on in the incubator for a very long time. The controller screen appears frozen, and I realize the controller has glitched and stopped running with the lightbulb on. When I restart the controller, it reads 140 degrees. I let it keep running overnight out of curiosity, even though 140 is definitely enough to kill the mold, and it looked like this in the morning, with an obvious zone of heat death in the bottom right:
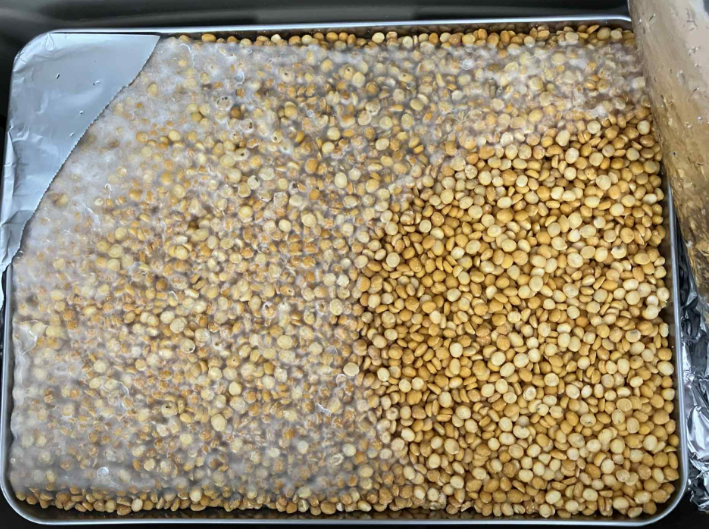
A sample of the tempeh around the edges that had not been heat sterilized tasted fine, but I still didn't really consider it safe to eat.
Attempt 3: To avoid glitching, I added more error handling in the controller and also a watchdog timer, which reboots the pico if communication is lost, and then repeated the steps in attempt #2. After ~23 hours, even though the controller was working, the temperature had reached 114 degrees. This happened because the fermentation generates its own heat and the mold had cooked itself to death. The tempeh smelled earthy, sweet, and correct, but certain parts that were touching the baking sheet had the telltale mucilage of bacterial contamination, probably Bacillus subtilis. This happens when there is too much standing water and not enough airflow. Also, tempeh should typically ferment for around 36 hours and because this tempeh had overheated itself early, there was low mycelial density between the grains, and the tempeh was floppy.
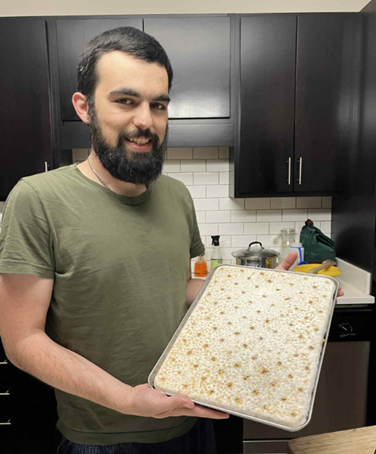
Attempt 4: To improve airflow at the bottom of the pan I drilled a grid of holes into the baking sheet. To give the incubator a way to reduce heat, I added a cooling fan. I drilled holes in the bottom of the box, and added a fan column on top of the lid, which the fan sat on top of. I then rewired the controller and outlets to have a second relay that could toggle the fan independently of the heater. Then I edited the code to have a temperature maximum that would turn the fan on, and added an MQTT topic to record these events. When the temperature was under 90, the heat would turn on. When it was above 95, the fan would turn on. Then I repeated the process, and made what I would consider my first decent batch of tempeh:
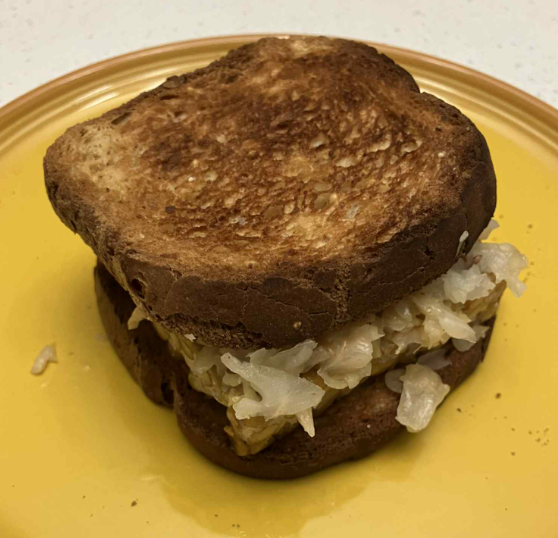
And here is a tempeh reuben I made with it:
Data
The last step, and the reason I built all the data infrastructure, is that I wanted to see the usage of the relays over time. I've made incubators in the past, but they all used off-the-shelf temperature controllers that gave me no control over signaling. I wrote a script that converts the on/off event data generated by the controller into timeseries data that shows the % of each hour a relay spent turned on. Then I plotted that against the temperature.
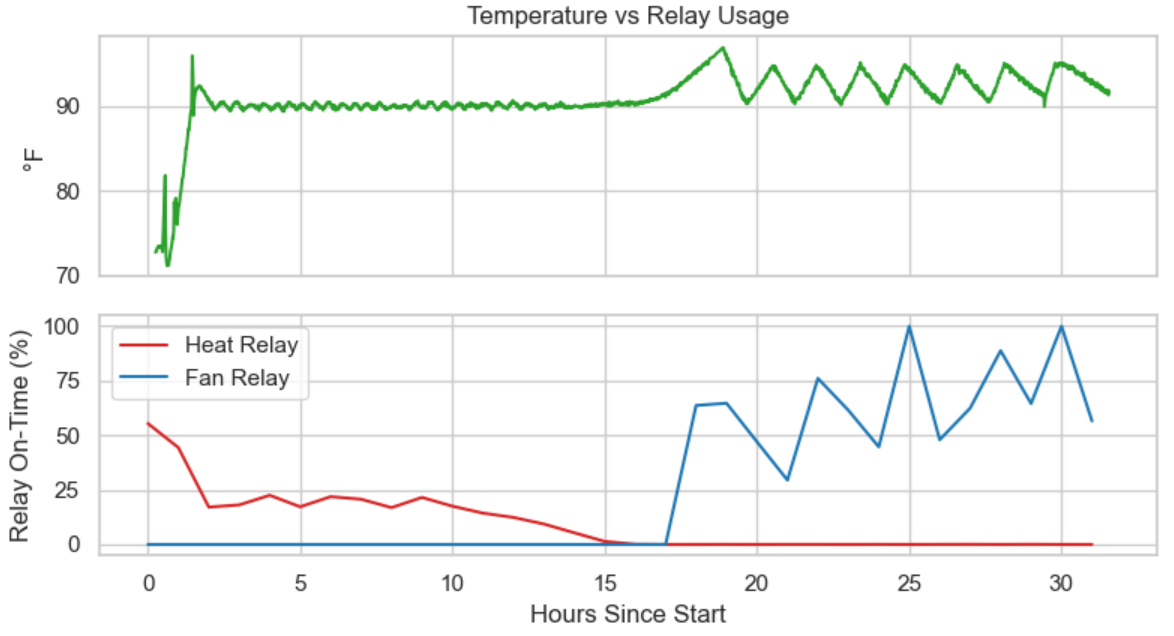
Great! We can clearly see how the tempeh needs additional heat in the beginning, then starts generating sufficient heat of its own, and finally needs to be cooled down by the fan. Success!
Conclusion
This was a long project that became way more complicated than I expected, but I'm happy that it's done and that the tempeh coming out of it is good quality. There are a few tweaks I will probably make, such as cooking the beans slightly longer and wrapping them in a muslin cloth to regulate humidity. There is also quite a bit of debate about the best temperature to incubate the tempeh mold at. I have been incubating at a safe middle ground of 90°F, but some people swear you can go as high as 97°F, and the colonization will be even more vigorous. I am hoping to also use this incubator to ferment other things, such as koji for miso/shoyu.